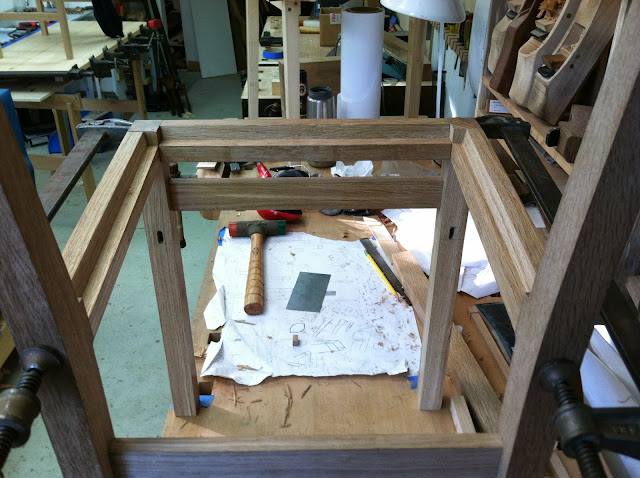
With joinery set, it's time to start shaping. This almost always follows the other as it's easier to take flat square pieces of wood to a machine than curved and angled pieces. So now, before glue up, I get to play and shape as I please. First, I take the bulky square leg stock down to a pleasant size and taper, then carve out little details with a knife that a machine just couldn't do...or couldn't do easily or well.
This includes knifing a round on the under edge of my front leg. This matches the cut near the back leg, for continuity and flow from front to back.
My next big step is to make room for my seat. I really haven't made mention of it yet and that's mainly because it's one of the last things I will do for this chair. That said, I have to prepare for it now. To do that, I am cutting out a space in the side rails and front stretcher that the seat can sit down into...technical word is a rabbet. A rabbet is cutting out a corner of a piece of wood along its entire length. I did this on the side rails...easy, and front stretcher...difficult, given the subtle curve added to the front.
Rabbet pictures:
To make it trickier and nicer (I don't choose complication for its sake alone) I wanted to angle the rabbet wall, so when you look down on it, you see a slope not a flat face. In other words, it's like a little hill, not a cliff...or, like an upside down one-sided this. A structural corbel from an ancient Ugarit palace, yeah...it's exactly like that. Anyways, on the straight side rails, it was easy using a small hand plane. On the front rail however, I had to use a knife and small chisel to accommodate its gentle curve. No more words...this will hopefully show what I'm talking about.
 |
| Notice curve and slight angle? |
This took a long while...but a little more work is necessary to prep for the seat, next post.


_02.jpg)
